
To begin with you need 3 lengths of ribbon, usually I estimate about 2 metre lengths for a small hanging pillow so in total it would be 6 metres if you were doing it in all the same colour ribbon, make sure they are all seperate lengths.Next fasten the 3 lengths of ribbon to the bottom point (in this case is the heart point), I usually slip stitch this together.
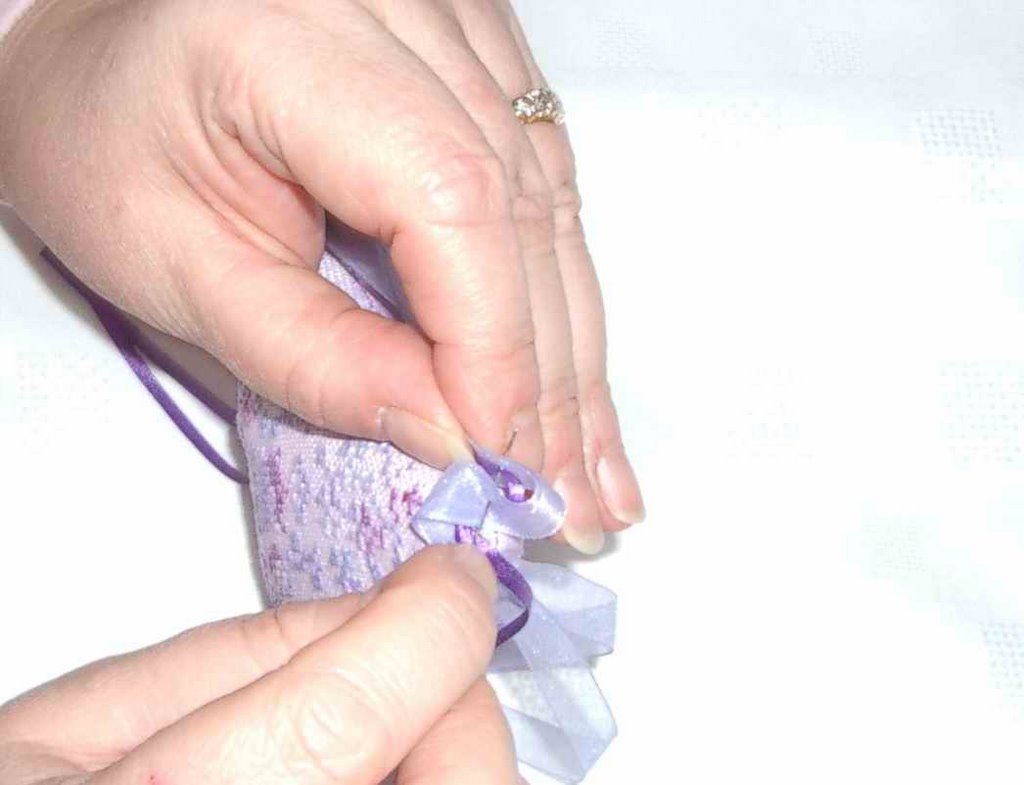
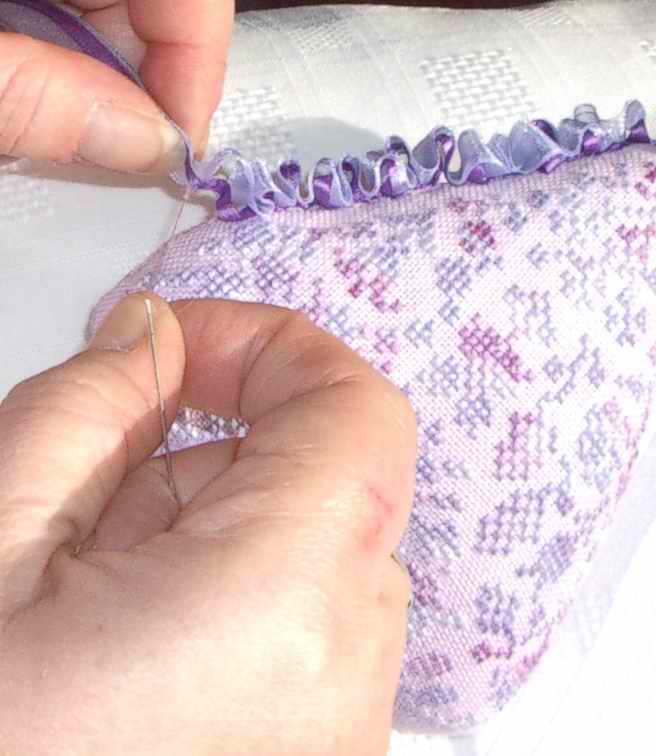
Now here I catch the ribbons with the needle and cotton pushing the needle through all the ribbon thickness
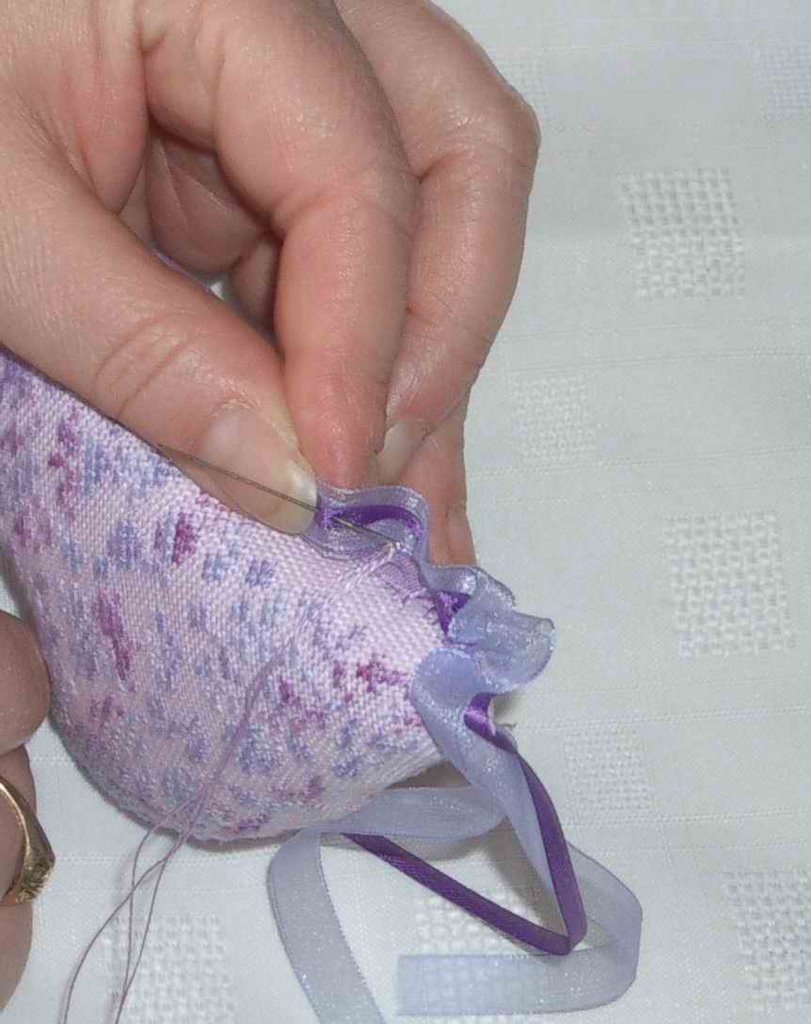
Then pull the thread towards you so that the ribbon ruches
Then catch the fabric through the seams with you needle this is about 1/4 inch intervals as I go along, then catch the ribbon again, this is usually about 1 inch intervals along the ribbon or however far or close you prefer the size of the ruches,
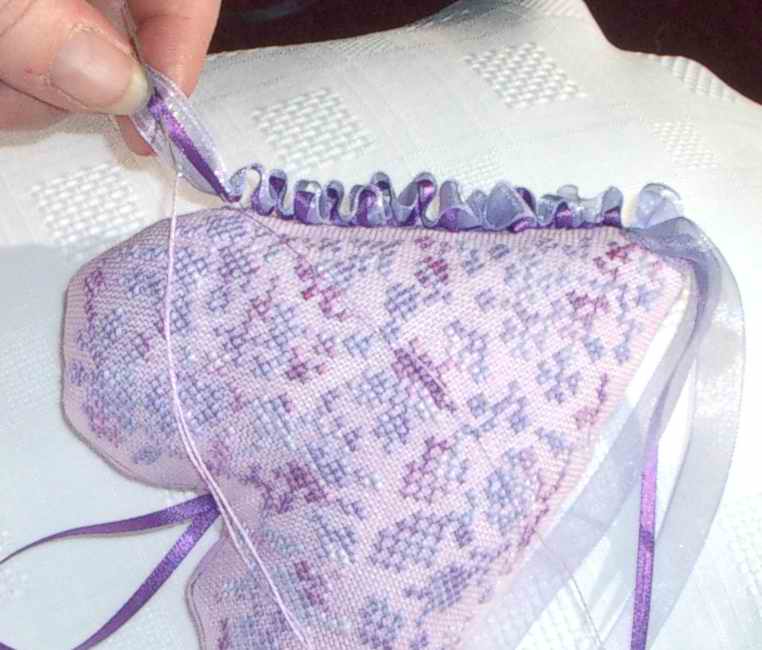
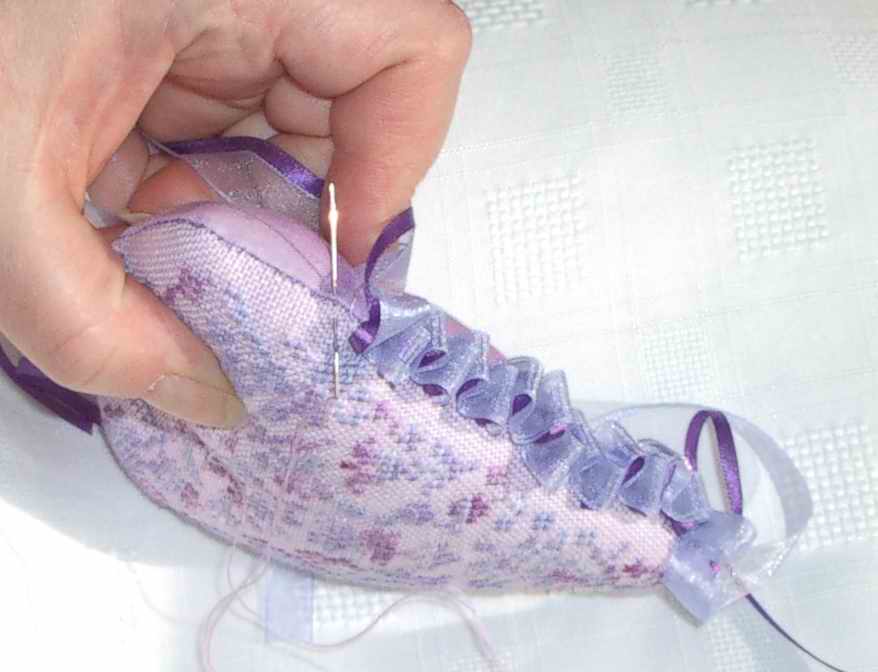
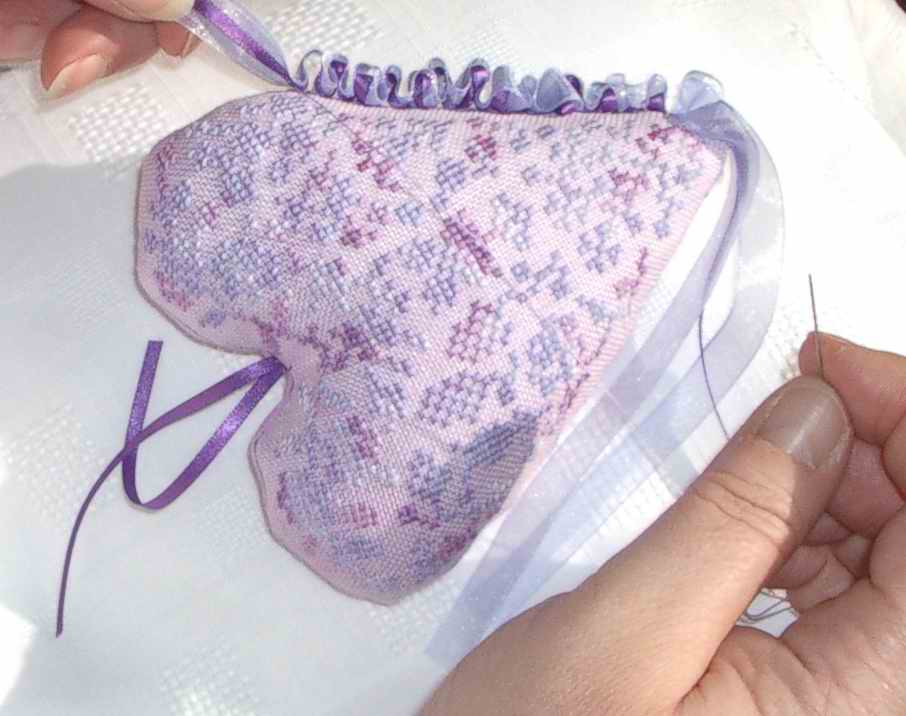
You do this all the way around your pillow until you get back to where you started I then catch the ribbons altogether and make a slight knot with them and fasten off, then trim the ribbons to length and you have the finished project.

This particular project is for my MIL for Mothers Day, the heart is a freebie by Anne Les Petites Croix and the thread I used is Lasting Friendship by Dragonfloss, its a lovely varigated thread in soft lilacs and mauves, the fabric is 32ct Lively Lilac hand dyed by Kates Kloths
Ribbon trim
15 comments:
Wow, thanks for this I am such a visual learner this really made it clear for me. I will have to give it a try. CJ
Thank you for posting these instructions - I have not tried this finish, but I think I could actually do it following the steps you documented. I think the pictures are great!
Thank you! I'm definitely going to give this a try - it looks relatively easy to do and it's so effective!
thank you Su!! You're so kind to be sharing this..
Thanks! I want to do this on an ornie and wasn't sure how!!
You make it look so easy Su!
You should set up a site giving instructions like this one for other ways you have finished pieces off - you did a great job in explaining and the photos are good too - thanks!
Hugs
Claire
BEEutiful work!!
Thanks for sharing!
This came out beautiful!
Thanks for posting the instructions. You did a great job with the photos and instructions.I am not sure I grasped it but at some point I will sit down and try it while looking at the pix and will probably figure it out
Waow !! it looks great ! I really like the colour you used for stitching it. Thanks so much for showing the finishing technique, I'll have to try this one soon...
Thank you for posting the instructions!! Your pictures are great, I really have to try this in one of my next finishings!!
Thanks Su it is very clear with the pictures! because my english is so bad that I am afraid to not understand all you have written!
I will try soon!
Su, you are a born instructor! Love the photos and the beautiful finished product.
THANKS!!! Beautiful heart design, your MIL will enjoy receiving this : )
Thanks for sharing your instructions! I love the way this ribbon looks!!
Post a Comment